How to publish a CLI created in Golang on NPM
Recently I started building tools that will help me automate my app deployment process easier and cheaper, to do that I knew CLIs are definitely going to be involved one way or another. So I started building two CLIs:
- Simp CLI: It's like Makefile just easy
- Thrusta CLI: It's a remote command execution tool
Both CLIs were built with Golang but only one is hosted on npm here, this tutorial will guide you on how you can do the same.
Note: Am still new to Go
Let's jump into it
Prerequisites
- Basic Golang syntax and concepts (Beginner friendly)
- NPM installed
- Golang installed (its a process, so here is a link)
What are we building?
We are going to create a CLI that serves a directory over a HTTP server.
Lets get started
Create a new folder inside
$GOPATH/src/<github.com|gitea.com|gitlab.com|bitbucket.com>/<username>/html-server-cliNext, we will create our go.mod file to track packages we are going to use
go mod initI have my directory setup as below:
.
+-- cli
    +-- cli.go
+-- helpers
    +-- helpers.go
+-- server
    +-- server.go
+-- go.mod
+-- go.sum
+-- html-server.go
Let add some code to our helpers/helpers.go
package helpers

import (
	"math/rand"
	"time"
)

// GeneratePortNumber handle generating port number
func GeneratePortNumber() int {
	rand.Seed(time.Now().UnixNano())

	min := 1000
	max := 99999

	port := rand.Intn(max-min+1) + min

	return port
}
The block of code above enables us to generate a random port number, you can add more logic to see if a port is used.
Next, let's add some code to our server/server.go
package server

import (
	"log"
	"net/http"
	"strconv"

	"github.com/bywachira/html-server/helpers"
)

// Serve handles serving the directory
func Serve() {
    // Generate our port number
    port := helpers.GeneratePortNumber()
    // Inform the user which port we are running
    log.Println("We are running on port: " + strconv.Itoa(port))
    // Exit to a live server
	log.Fatal(http.ListenAndServe(":"+strconv.Itoa(port), http.FileServer(http.Dir("."))))
}
Let's create a method to initialize our CLI
package cli

import (
	"fmt"
	"sort"

	"github.com/bywachira/html-server/server"

	"github.com/urfave/cli/v2"
)

// SetupCLI initialize cli
func SetupCLI() *cli.App {
	app := &cli.App{
        // List your commands here
		Commands: []*cli.Command{
			{
                // Provide details about our cli flags
				Name:    "run",
				Aliases: []string{"r"},
				Usage:   "Serve your HTML file",
				Action: func(c *cli.Context) error {
                    // The logic to be called when this commad is ran
                    fmt.Println("We are serving this directory")

					server.Serve()
					return nil
				},
			},
		},
    }

	sort.Sort(cli.FlagsByName(app.Flags))
	sort.Sort(cli.CommandsByName(app.Commands))

    // Return our cli
	return app
}
Let's update our package main, which is html-server.go
package main

import (
	"log"
	"os"

	"github.com/bywachira/html-server/cli"
)

func main() {
    // Assign our cli to the app variable
	app := cli.SetupCLI()

	err := app.Run(os.Args)

    // Exit program when we get an error and show error
	if err != nil {
		log.Fatal("Error: ", err)
	}
}
Note: You don't have to use
github.com/urfave/cli/v2package by default, you can use whatever package you want because all we need to publish is the binary file.
The Publishing Part
We are publishing out CLI to NPM so a package.json file is a must
npm initFollow the prompts and fill them with your own preferred fields
This is how mine looks like
{
  "name": "@wachira/html-serve",
  "version": "0.0.0",
  "description": "Serve your current directory",
  "main": "index.js",
  "scripts": {
    "postinstall": "go-npm install",
    "preuninstall": "go-npm uninstall"
  },
  "repository": {
    "type": "git",
    "url": "git+https://github.com/bywachira/html-serve.git"
  },
  "keywords": ["cli", "automation"],
  "author": "tesh254",
  "license": "MIT",
  "bugs": {
    "url": "https://github.com/bywachira/html-serve/issues"
  },
  "homepage": "https://github.com/bywachira/html-serve#readme",
  "dependencies": {
    "@wachira/html-serve": "^1.0.3",
    "global": "^4.4.0",
    "go-npm": "^0.1.9"
  },
  //   Specify details about your binary
  "goBinary": {
    //   Name of the binary file and what npm will alias as
    "name": "html-serve",
    // Where to add the binary
    "path": "./bin",
    // Dynamic URL pointing to where the compressed binary exists based on version, platform, and the processor type (amd64, arm, and more)
    "url": "https://github.com/bywachira/html-serve/releases/download/v{{version}}/html-serve_{{version}}_{{platform}}_{{arch}}.tar.gz"
  }
}
We added two commands in scripts which are
{
    "postinstall": "go-npm install",
    "preuninstall": "go-npm uninstall"
  },
What postinstall does is that after installing the package it will pull the binary from where you saved it Github or Amazon S3,
Note: We will host our binaries on Github, most probably you have a free account there. All you need is just a public URL pointing to your binary.
preuninstall basically removes the existence of your binary from the bin directory before NPM uninstalls the package.
For go-npm to work, we need to add it as a dependency
npm install go-npm --saveThis will create a node_modules folder, add it to your .gitignore file, to avoid pushing it to Github.
For our CLI tool to work on all operating systems, we need to build a binary that works for each, well not to worry we will use the goreleaser package that bundles the app to multiple binaries for each OS specified and processor arch.
To install GoReleaser visit this link.
Let there be binaries
Before we can build our OS-specific binaries we need the following:
- Github/Gitlab token(based on where you want your binary to reside)
- Initialize version control (
git) - Git basic commands
Creating our token
- Create your token here
- Create a
.envfile which should be also added to the.gitignorefile, and add the following
export GITHUB_TOKEN=<YOUR GITHUB TOKEN>Initialize Git
git initWe need to create a tag and push it as GoReleaser will use the latest Git tag of your repo.
git tag -a <version> <commit> -m <release label>Export our variable
source .envDefine goreleaser config and define the arch and operating systems you want to build for.
builds:
  - binary: html-server
    goos:
      - windows
      - darwin
      - linux
    goarch:
- amd64Run goreleaser
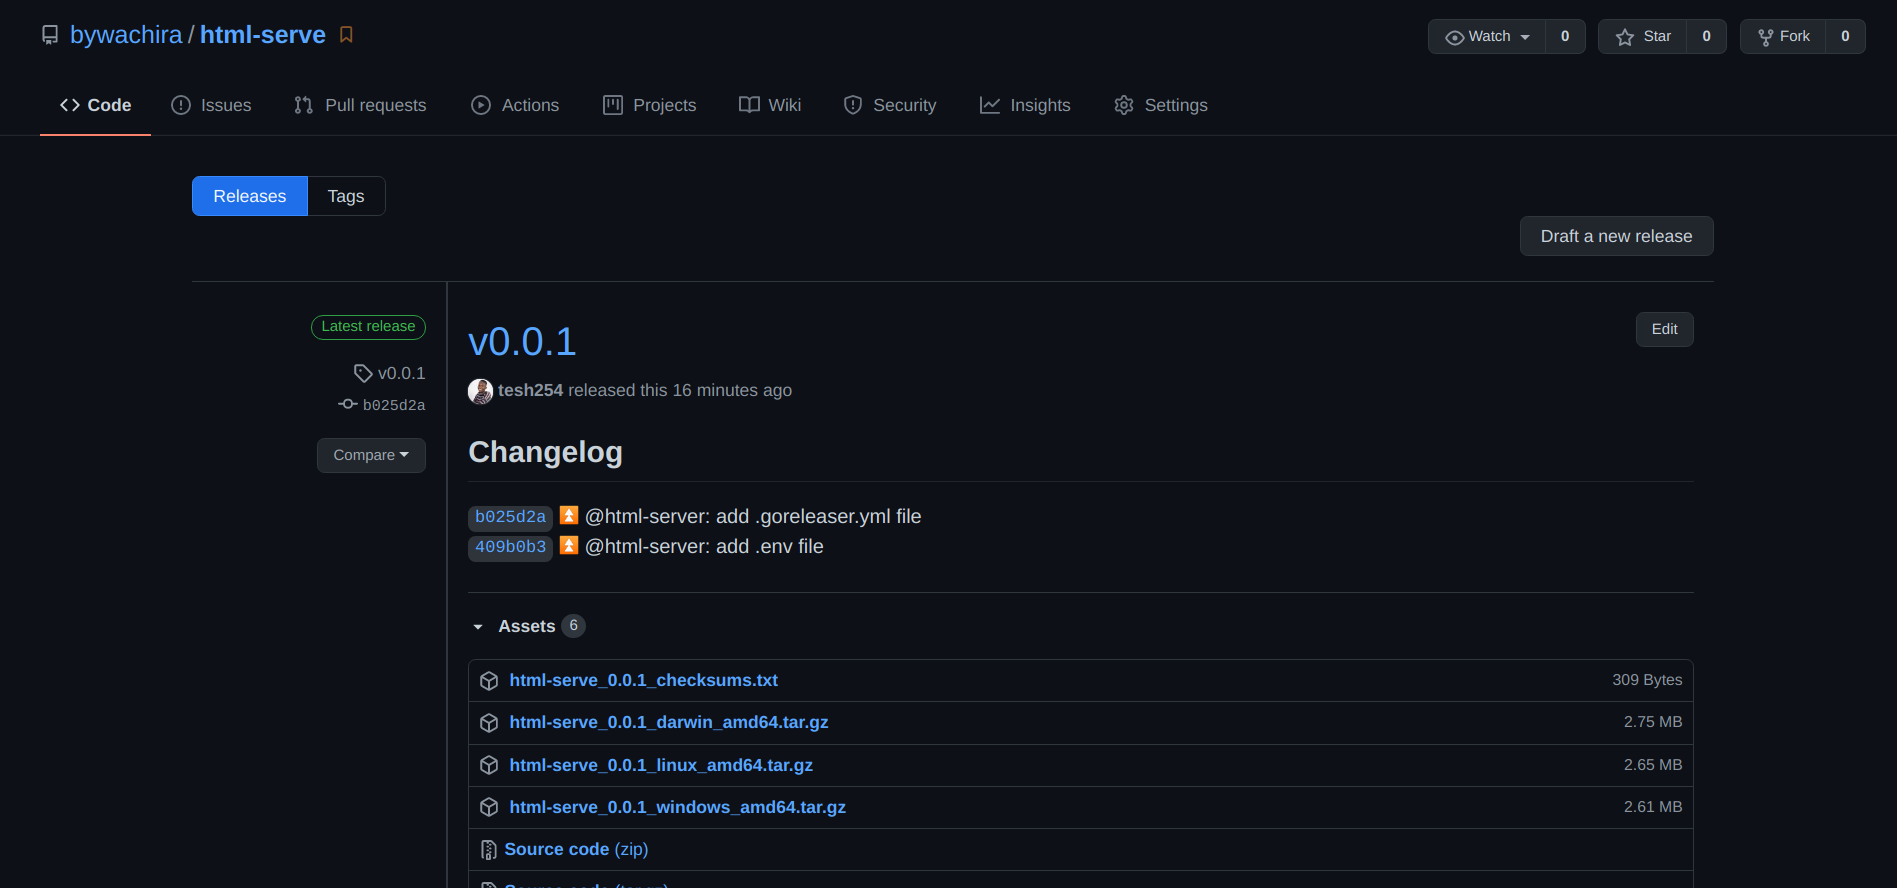
goreleaser releaseThe above command will publish your CLI to Github or Gitlab based on where your repo is hosted.
If you visit your repo and click on releases, you should see something like this

Next, this CLI needs to be published to npm.
Before you can do that ensure you have the following done:
- An account on
npmjs.com - Login to account using
npm clibash npm loginAnd now let's publish
npm publish --access=publicThe --access=public flag means the package will be publicly available for download

You just got your package published
Things you should note
- For package documentation, update your repo readme and update the version on your package.json for npm to pick-up.
- If you need to make any changes at all even a typo fix, you will have to update the npm version on package.json to update the package.
Summary
- We made a CLI in Golang
- We generated binaries for all major OSs
- We published our package
- Add dist folder created by
goreleaserto .gitignore file
Questions
- Join my discord, I answer all questions, here
I have web monetization enabled so you can support my work or give me feedback on this article on what I should improve on.


